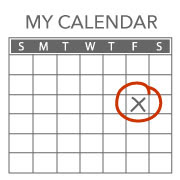
...to become a Stampin' Up! demonstrator for the low price of $105.
Today is the last day to take advantage of the mini starter kit for $105. This mini kit includes everything you need to get started as a demonstrator.
Instead of the mini starter kit, you could purchase the standard starter kit which costs $269. Along with all the kit contents, you would receive all 6 of the new In Colours for FREE as well as a pack of assorted In Colour cardstock.
What are you waiting for? Sign up today!


 This card uses the level 1 hostess set Of the Earth. We used a technique known as bleaching. This really has a wow factor and I think this card turned out really well.
 Each of the ladies also got to make a name tag. For mine, I used the Razzleberry Lemonade Designer Series Paper to cover the scallop circle. We used the Big Shot to cut out the circle and the letters for our name. We attached a large brad through the top and a key ring and added some ribbon. I will show you the other card we made later this week.
 The cardstock I used is Soft Suede for the card base, Dusty Durango and Whisper White for the layers. I used the leaf image from the stamp set Best Wishes & More and inked it with Soft Suede, Crushed Curry, Dusty Durango, and Handsome Hunter ink. Some the images I inked off before stamping them to create more of a varied look with the leaves. I created my "ribbon" by taking a thin strip of Crushed Curry cardstock and scrunching it up. I then peeled it apart at stuck one piece to the card and used the other piece to tie around. I used the stamp set Teeny Tiny Wishes for the greeting and stamped it on a small piece of Whisper White cardstock. Overall, I am pleased with this card but it was difficult! Why don't you grab your supplies and try to make a SIP card!
 One of Scott's co-workers had a baby recently so this is the card I made for them. It is hard to see in the picture but I stamped 'hello baby' from the set Teeny Tiny Wishes in the corner of the whisper white cardstock. The stroller is made using punches. The ribbon and dsp is retired but I thought it added a nice touch to the card.
 I also made this using the Big Shot and the scallop circle die. I covered a piece of chipboard with dsp and then cut it out. I used the Go G0 Boots letters and the Big Shot to cut out the name and then glued it on. I put a jumbo brad through the top and attached the key ring with some ribbon tied around it. This tag could go on the baby's diaper bag.


.png)


